Today was the day where we finally set up our installation. It was a very long day trying to finalise the last few details. We came across some complications but we were able to overcome them.
We started off by testing the projection, we tried it in a couple off different places in the room with different proportions. In the end we decided to have it projecting on the back wall and making it quite large. We had to change the colour and the contrast of the photos on the projector as they were coming up very red.
 |
| Projector |
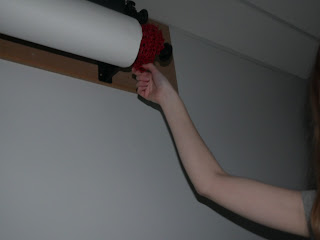
Next we had to to hang the masks, we found that after a while the string was sliding off the thumb-tacks so we fixed this by attaching blue tack to them to give more strength and support. We had to play around with the arrangement of the masks to make sure they weren't all bunching in one area and that they hung at different levels to look like they were dispersed appropriately.
 |
| A quick fix |
 |
| Hanging masks |
Another issue that we had was the masks blocking the projection, realistically we would have liked if the projector could be up high but that wasn't doable with the facilities we had. So we had to arrange them more so to the sides so it wouldn't cover the faces.
 |
Hanging masks at the right levels
|
Next we had to figure out our lighting and what was going to look best for this project and light up the masks enough to read, without taking away the dark feel that we wanted in the room. First we tried box lights, which were vert bright so they lit up the whole room, so we tired to cover them to make the light less harsh, this still didn't work very well for us.
 |
| Covering the box light |
 |
| Covering the box light |
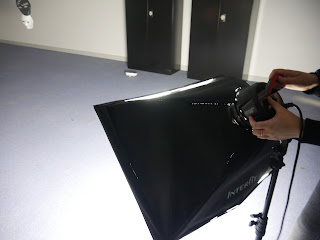 |
| The box light |
Next we tried some lamps that we had but they were also too bright and they got very hot very quickly so we didn't want to cover them with anything for safety issues. So we decided against using these also.
 |
Lamp
We were at our last option with lights, we had brought in some small battery operated spot lights which we firstly tried just placing on the floor so they would just shine up and put emphasis on the masks, also making then bright enough for you to be able to read them, but we felt this wasn't right either. We then tried sticking them to the ceiling so they would shine down on them but they didn't stay stuck for very long. Our last option was to stick the lights to the wall and thankfully we were finally happy with something! We felt this was the best option that we tired and we were happy with how it lighted up the masks but also still left that room dark enough for the effect we were going for.
|
Next was trying to perfect the audio, we brought a speaker but we forgot to bring an aux to connect it to the projector, so firstly we were just playing it from the projector but the audio quality wasn't great as it was muffled. Thankfully Helen was to the rescue and she supplied us with some Logitech speakers, and that sounded better immediately when we plugged them in. The sound was a lot clearer and projected better around the room.
 |
Original speaker with no lead
|
 |
Logitech speakers we are using
|
Another issue with our project is that if people are walking around the room that will interfere with the projection and it will the shining on them, that is why ideally we would have liked to have the projector up high. To overcome this we lined out the floor with areas that you must walk around with tape.
 |
Marking the floor with tape
|
One other slight issue we had is that there is a green light in the ceiling on the room, and this was shining on some of the masks, to fix this we put brown tape over the light to try and block it out, unfortunately the tape was not string enough to completely eliminate the light, but it stoped it from shining on some of the masks so we were happy enough with this.
 |
| Mysterious green light |
The wall which we were projecting against had a white back drop at it, so we winded this up as we thought it looked better against the wall, but there was still a red chain hanging from each side which took away from the look so we had to tie these up so there was nothing else on the wall to take away from our video and also the shadows of the masks.
 |
| The white backdrop |
 |
| Red chain |
 |
Red chain tied up
|
After all of this was done we were happy with the final piece and were ready to present it!
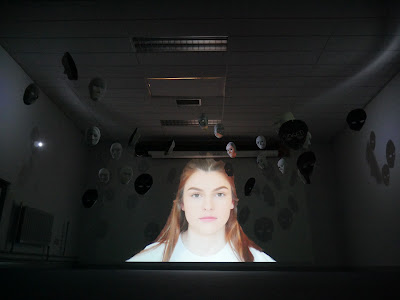 |
| The Final Product |


Comments
Post a Comment